In Lightning Process Builder: One Process To Rule Them All, Director of Salesforce Platform, Jake Brushafer, showed us how to prioritize calls or invoke controls using Salesforce’s Lightning Process Builder. Today, Director of Salesforce Practice, Lacey Van Syckle, will overview how you can also leverage this tool to improve your customer’s overall experience with your call center.
“Chaos reigned.”
– J.K. Rowling, Harry Potter and the Deathly Hallows
When your call center has heightened activity, it’s easy for chaos to reign. Lightning Process Builder can help manage this chaos by automating your business processes. Let’s say you want every closed case to result in a case closure email, but your Customer Service Agents frequently forget to hit the “Send An Email” button when call volume is high. Lightning Process Builder can solve this problem!
Creating the Roadmap
After you have your HTML email template setup with your case closure email and associate it to an email alert (email alerts can also be created during the Process Builder setup) with the recipient as a related contact, it’s time to set up your Lightning Process Builder.
1) New Process
The first step is to go to your setup menu and select “Process Builder.” Then name your new Process and select “a record changes” from the process starts when drop-down menu.

2) Set Your Criteria
The next step is to choose “Case” as your object and to start the process “when a case is created or edited.” Now it’s time to add your criteria – have the criteria execute when “conditions are met” and set the conditions to execute when “Case.Status” is equal to “Closed.” Under the “Advanced” section choose “Yes” to ensure you are only invoking the process builder when relevant criteria is changed.

Now any time a customer service representative creates or edits a case and proceeds to close the case, your customers will receive an email letting them know their issue has been resolved.

3) Define Your Action and Activate
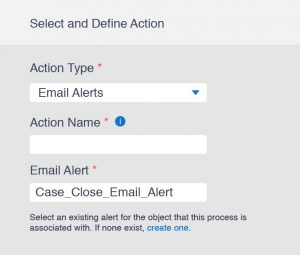
It is important to then define the action by setting your action type to “Email Alert” and select the specific email alert you already created. The last step is to “Activate” your process. Now you are ready for the process to take action!
Want to learn more about how you can use Lightning Process Builder and other Salesforce automations to build a more enjoyable customer support journey? Use Trailhead to earn your Process Automation Badge and get ready to watch the magic unfold.